
Welcome to Your Piercing Era!

So, you finally did it – you got that ear pierced! Welcome to your piercing era (yes, that’s a thing). We know you’re excited to show off those new earrings, and maybe a tiny bit nervous about taking care of them. Don’t worry, we’ve got you. Proper ear piercing aftercare can make or break your piercing experience, turning an “ouch” moment into an “OMG, I love my new look!” journey. This is the ultimate ear piercing guide to help you heal like a pro. Keep reading to learn how a little TLC (tender loving care) will keep your new ear bling happy, healthy, and ready to shine.
How Long Does It Take for Ear Piercings to Heal?
One of the first questions new piercees ask is: “How long am I stuck in healing mode?” The truth is, ear piercing healing time can vary from person to person, but it mostly depends on the type of piercing you got. Here’s a quick breakdown of healing times by piercing type:

-
Standard ear lobe piercing: ~6–8 weeks for initial healing. Ear lobe piercings tend to heal the fastest (yay!).
-
Upper lobe or cartilage piercing (helix, third hole, etc.): ~3–6 months. Cartilage has less blood flow, so it takes longer to heal than the soft lobe. Patience is key here.
-
Multiple piercings or a fully curated ear: up to 12 months (about a year). If you got a whole earful of new piercings at once, expect an extended healing period as each piercing needs time.
(Remember, these are average estimates. Your body’s healing superpowers might be faster or slower. Factors like your overall health, aftercare routine, and even sleep and stress levels can affect healing.)
Quick reference healing chart:
As you can see, a simple ear lobe piercing might be good to go in a couple of months, while a cartilage piercing or multiple piercings on one ear could need the better part of a year. No matter what, taking care of your new piercing consistently will ensure you heal as quickly and safely as possible.
Ear Piercing Healing Process: What to Expect
Healing an ear piercing is a journey, and your body will go through several stages on the way to fully healed, beautiful piercings. Here’s what to expect during each phase of the healing process:
Initial Healing Phase (Days 1–7)
The first week, your ear is basically saying “I’m healing, be gentle with me!” It’s normal to experience mild swelling, redness, and tenderness around the piercing during these first few days. Don’t freak out – that slight throbbing or warmth is expected. Focus on keeping the area clean and hands off (touch only when cleaning, with super clean hands). Also, try not to sleep on the side of your fresh piercing; give your poor ear a break! (Pro tip: a travel pillow with a hole in the middle is a lifesaver for side-sleepers – more on that later.) All in all, this phase is all about doing your aftercare diligently and letting your ear begin its natural healing.
Forming a Protective Barrier (Weeks 2–4)
By the second to fourth week, your body is working hard to form a protective barrier around the new piercing. You might notice light scabbing or crusting on the piercing – resist the urge to pick at it (we know, it’s tempting, but don’t!). That crusty stuff is a sign your body is healing naturally and creating a shield to keep out infection. Keep up your cleaning routine: gently clean away any crust using saline (more on saline in a bit) and continue to avoid unnecessary fiddling. At this stage, things might look better on the outside, but you’re not done yet – consistency is key.
Tissue Strengthening (Weeks 4–8)
Around weeks 4 through 8, you’ll likely notice the redness and swelling have subsided significantly, and any initial discomfort has faded. Hooray! Your piercing may feel totally fine and healed on the outside. But hold up – the inner tissue is still repairing itself. This is that tricky phase where people get overconfident. Even if it looks good, you’ve got to keep up the aftercare to avoid irritation or sneaky infections. Think of it like a house: the paint is dry, but the foundation inside is still settling. Continue your saline cleans and gentle care until you’re truly in the clear.

Complete Healing (2–6+ months, depending on piercing type)
Anywhere from two months to six months (sometimes longer) after the piercing, you’ll reach the complete healing stage – the finish line! For ear lobe piercings, complete healing often happens around the 6–8 week mark (about 2 months). For upper lobe and cartilage piercings, it can be 3–6 months, or even up to a year for tougher cartilage or multiple piercings. Remember, healing time may vary based on your individual skin and how well you stuck to your aftercare routine. You’ll know you’re there when the skin feels normal: no redness, no swelling, no tenderness, and no more crusties. At this point, the piercing channel (the hole) is fully strengthened. Changing earrings should be easy and painless. Still, it’s smart to be gentle when swapping jewelry for a while, because even a healed piercing can be delicate if yanked or traumatized.

Signs of Trouble: Keep an eye out for anything that doesn’t feel right during healing. Persistent pain that gets worse instead of better, yellow or green pus-like discharge, or increasing redness and swelling (especially if it was already improving before) could indicate an infection or issue. Also, watch for symptoms like fever or the area feeling hot to the touch. If you suspect something’s wrong beyond the normal healing hiccups, don’t tough it out – consult a professional piercer or dermatologist. It’s always better to be safe and catch a problem early.
Bonus Tip: Don’t remove or change your earrings too soon! We know you’re dying to try that cute pair of hoops, but switching jewelry before the full healing window is complete can re-injure the piercing. Taking an earring out too early might even make the hole close up (yes, even if it looks healed). Patience is your BFF here – wait until you’re fully healed, and then you can swap styles to your heart’s content.
Post Ear Piercing Care: Your Daily Ritual
Think of post ear piercing care as your daily self-care ritual for your new piercing. A little effort each day keeps the piercing gremlins away! Here’s your everyday aftercare to-do list:
-
Clean with saline spray: Gently clean your new piercing twice a day with a saline solution. You can buy a sterile piercing aftercare spray, or make your own at home (mix 1/4 teaspoon of non-iodized sea salt into a cup of warm distilled water – easy and cheap!). Spray or dab the saline onto the front and back of the piercing to rinse away any germs or crust. (Pro tip: If you have an ear piercing with studs, make sure you get the solution around the earring post and backing, because stuff can accumulate there.) After applying saline, you can let it air-dry or pat gently with a clean disposable paper towel. (Avoid regular cloth towels – they can harbor bacteria and snag on your earring.)
-
Hands off and no twisting: This one’s tough love – do not fiddle with your new piercing! It might be tempting to twist the earring “to prevent sticking,” but that’s an old myth. Twisting can actually irritate the fresh wound and introduce bacteria. So keep your hands off unless you’re cleaning it, and even then wash your hands first. Treat your piercing like a tiny wound (because it is) that needs peace to heal. The less you disturb it, the happier it will be.
-
Sleep smart (aka give your ear a break): Sleeping directly on a new piercing can be a pain (literally). If you’re a side sleeper, try using a travel pillow or a special piercing pillow with a hole in the middle. Basically, you want your ear to hover in the donut hole so you’re not putting pressure on the fresh piercing while you snooze. It might look a little silly, but your ear will thank you in the morning. Also, change your pillowcases often – clean bedding ensures you’re not resting your healing ear on a buildup of bacteria or hair products.
-
Avoid harsh cleaners and chemicals: Stick to saline and gentle soap if needed – no alcohol or hydrogen peroxide on a fresh piercing! Products like rubbing alcohol, peroxide, or strong antiseptics can dry out and irritate the piercing, actually slowing down healing. (They’re too harsh for your delicate new piercing.) Similarly, skip ointments like Neosporin; they can trap dirt and don’t let the piercing breathe. Over-cleaning is also a thing – cleaning 2-3 times a day is plenty. More is not more here; too much cleaning can irritate the skin. Keep it simple and consistent.
-
Watch out for hair & products: Be mindful when brushing your hair or styling – it’s super common to accidentally catch a brush or comb on new earrings (ouch!). Take care when pulling shirts or sweaters over your head; go slow and maybe cover the ear with your hand. Also, try to keep hair spray, perfumes, and other beauty products away from the piercing during the early weeks, as they can cause irritation. If you use headphones or talk on the phone a lot, be careful that they’re not rubbing directly on the new piercing.
-
Keep it dry (ish): It’s fine to shower after a piercing (in fact, the gentle soap and water are okay as long as you rinse well), but avoid submerging your piercing in still water. Steer clear of swimming pools, hot tubs, lakes, or the ocean for at least a couple of weeks if you can – those waters can contain bacteria that might sneak into your piercing. If you do get your piercing wet, just clean it afterward. And always pat it dry gently; leaving a piercing damp under an earring backing could invite bacteria.
By making these steps part of your daily routine, you’ll create the perfect environment for your ear piercing to heal. It might seem like a lot at first, but soon it’ll become second nature – just like brushing your teeth or washing your face. And your reward for this diligent post-piercing care? An ear piercing that heals beautifully and can last a lifetime. 🎉
How Do I Know If My Piercing is Healed?
Is it time to celebrate and swap out those starter studs? Before you declare your piercing healed, do a little test. Take this quick checklist quiz to see if you’re truly in the safe zone:
-
No redness, swelling, or tenderness: The skin around your piercing is back to its normal color and size, and it doesn’t feel sore to the touch anymore. (It shouldn’t feel like a hot potato or look angry red.)
-
No discharge or crusting: You’re no longer seeing any of that whitish crust or lymph fluid on your earring or ear. The piercing isn’t oozing anything funky – it’s nice and clean with no gunk.
-
Jewelry moves freely: The earring can rotate or move a bit without any resistance or pain. (Don’t force it, but a healed piercing usually loosens up. Studs might still be a tad stiff, but you can tell the inside isn’t gripping the jewelry anymore.)
If you’ve checked all the boxes above, congrats – your piercing is likely healed or very close! 🎉 This means you’ve made it through the hard part. However, a word of caution: even when all signs point to “healed,” you should still be gentle and go slowly with any changes. When you first remove the earring, do it in a clean environment and have a new one ready to insert (you don’t want the hole sitting empty for long). Remember, every body heals differently. Never rush to remove earrings too soon, because a hole can start closing surprisingly fast, even if it’s been a couple of months. It’s safer to err on the side of caution and keep an earring in until you’re absolutely sure (or even a couple of weeks beyond that, just to be safe).
Bottom line: You’ll know your ear piercing is healed when it looks and feels like a regular part of your ear – no fuss, no muss. At that point, you can officially graduate from “healing mode” to “styling mode!” 🙌 But speaking of styling... what’s next after healing? Let’s talk about living your best pierced-ear life.
Ear Piercing Maintenance: Beyond the Healing Stage
Yay, you’ve made it through the healing process – but that doesn’t mean you’re done caring for your ears. Think of piercing maintenance as the long-term care plan for your lobes and cartilage. Here’s how to keep your piercings happy and your earrings looking 👌 for the long haul:
-
Safe jewelry swapping: Once you’re fully healed, you can finally change up your jewelry. When and how should you do it? We recommend waiting until the end of the healing period (as discussed above) before your first swap. The very first time you change that stud, be gentle. Wash your hands (still a rule!) and maybe do it after a warm shower – the warm water can help loosen any bits and expand the piercing slightly, making the earring easier to slide out. If you’re nervous, visit a professional piercer and they can assist with the first change. Going forward, always choose high-quality jewelry for your piercings. Now’s a great time to treat yourself to those gorgeous 14k fine gold earrings you’ve been eyeing – not only are they super stylish, but 14k gold is also friendly to sensitive skin (less chance of irritation). Remember, even beyond healing, cheap mystery-metal earrings can irritate a piercing, so invest in quality pieces for the best experience.
-
Keep a cleaning routine (yes, even after healing): Just because your piercing is healed doesn’t mean you should forget about hygiene. You won’t need to do saline soaks every day forever, but it’s smart to maintain a cleaning routine. Clean your earrings and ear area periodically – for example, whenever you change earrings, give the new jewelry a cleaning (use a little alcohol on the earring before you put it in, or wash it with gentle soap and water). In the shower, it’s fine to let some mild soap run over your piercings and then rinse thoroughly. Make sure to dry the area well afterward. If you ever notice a bit of irritation (say, after wearing headphones or if an earring was too tight), you can always do a quick saline rinse to calm things down. Think of piercing maintenance like dental hygiene – a little regular care prevents problems down the road.
-
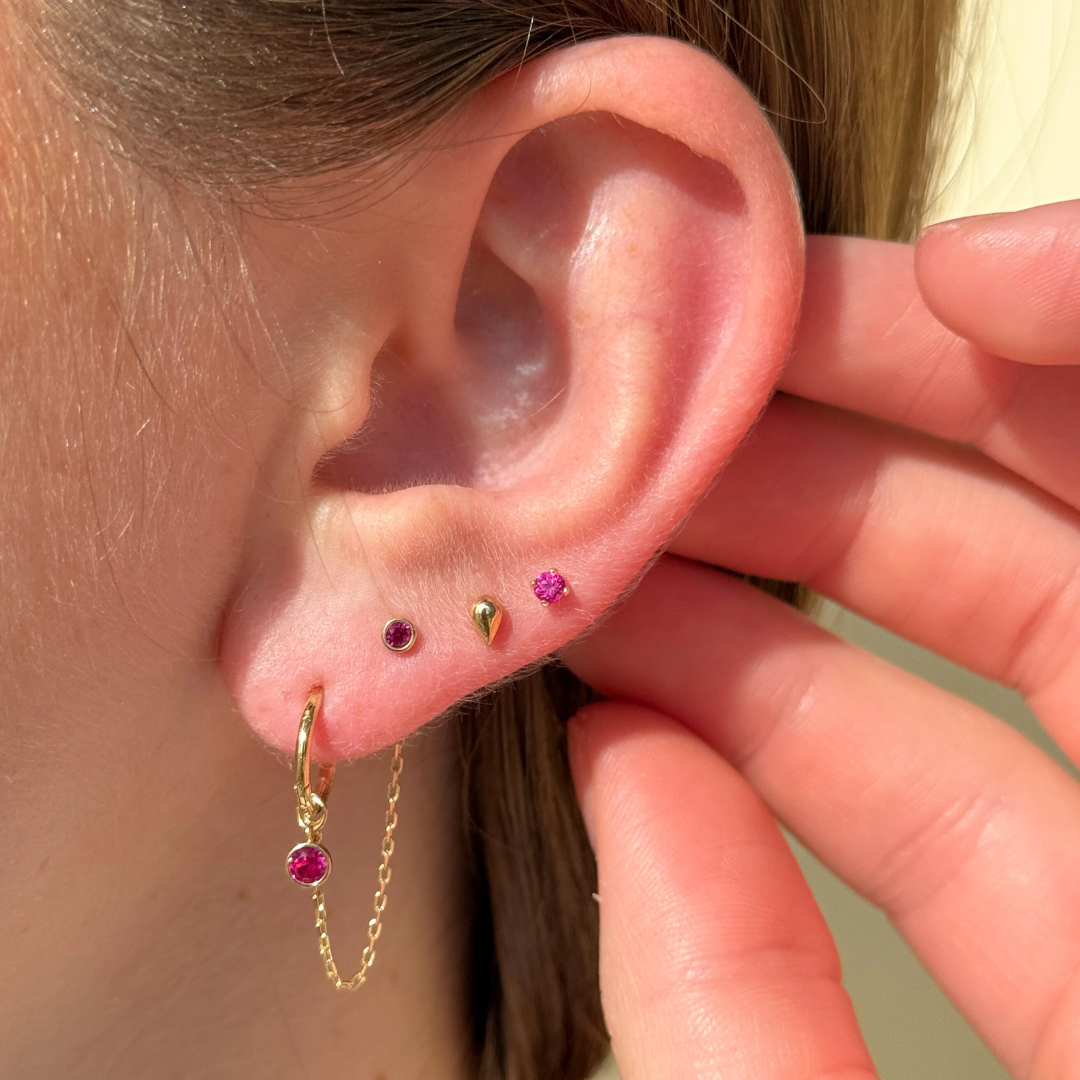
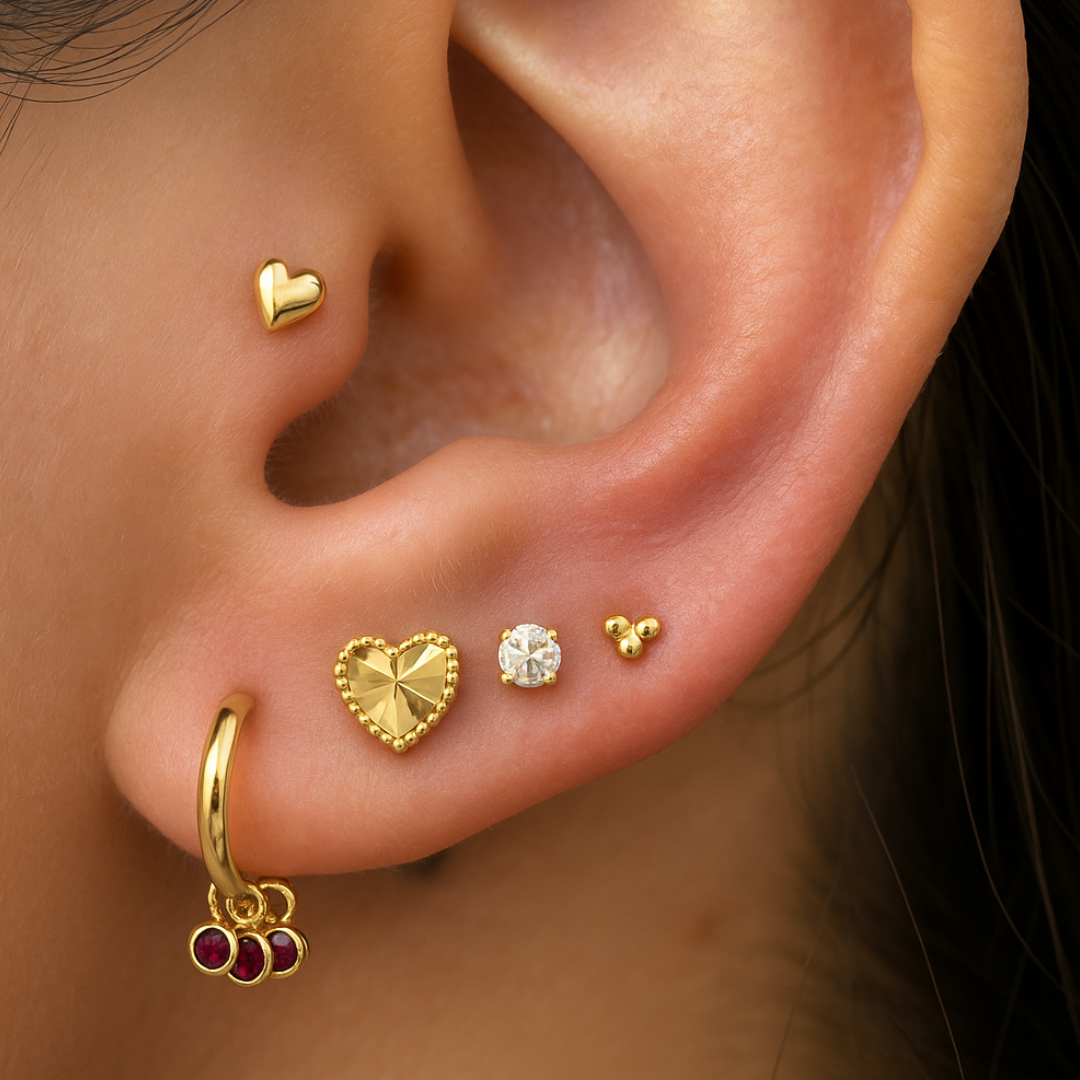
Time to style and accessorize: Now for the fun part – styling your healed piercings! Once you’re out of the healing woods, you can mix and match earrings to create your own signature look. Do you have multiple piercings in one ear (like doubles, triples, or cartilage piercings)? Try experimenting with different arrangements: a cute stud in the first hole, a tiny hoop in the second, a dainty drop or cuff on the cartilage. The options are endless and so much fun. Need inspiration? Check out our cartilage piercing earrings collection for lots of chic jewelry options perfect for healed piercings. (Think sparkling studs, little 14k gold huggies, and decorative cartilage pieces that will elevate your ear game.) Feel free to express yourself – the whole point of getting these piercings was to rock your style, right? Just remember to change jewelry with care (don’t force anything that’s stuck, and always secure the backs!), and enjoy the new versatility of your earscape.
By keeping up with these maintenance habits, your piercings will stay healthy and looking fabulous. It’s all about respecting the piercing even after it’s healed – treat it well, and you’ll be adorning those ears with beautiful earrings for years to come.
Tips for Curated Ears & Trendy Stacks
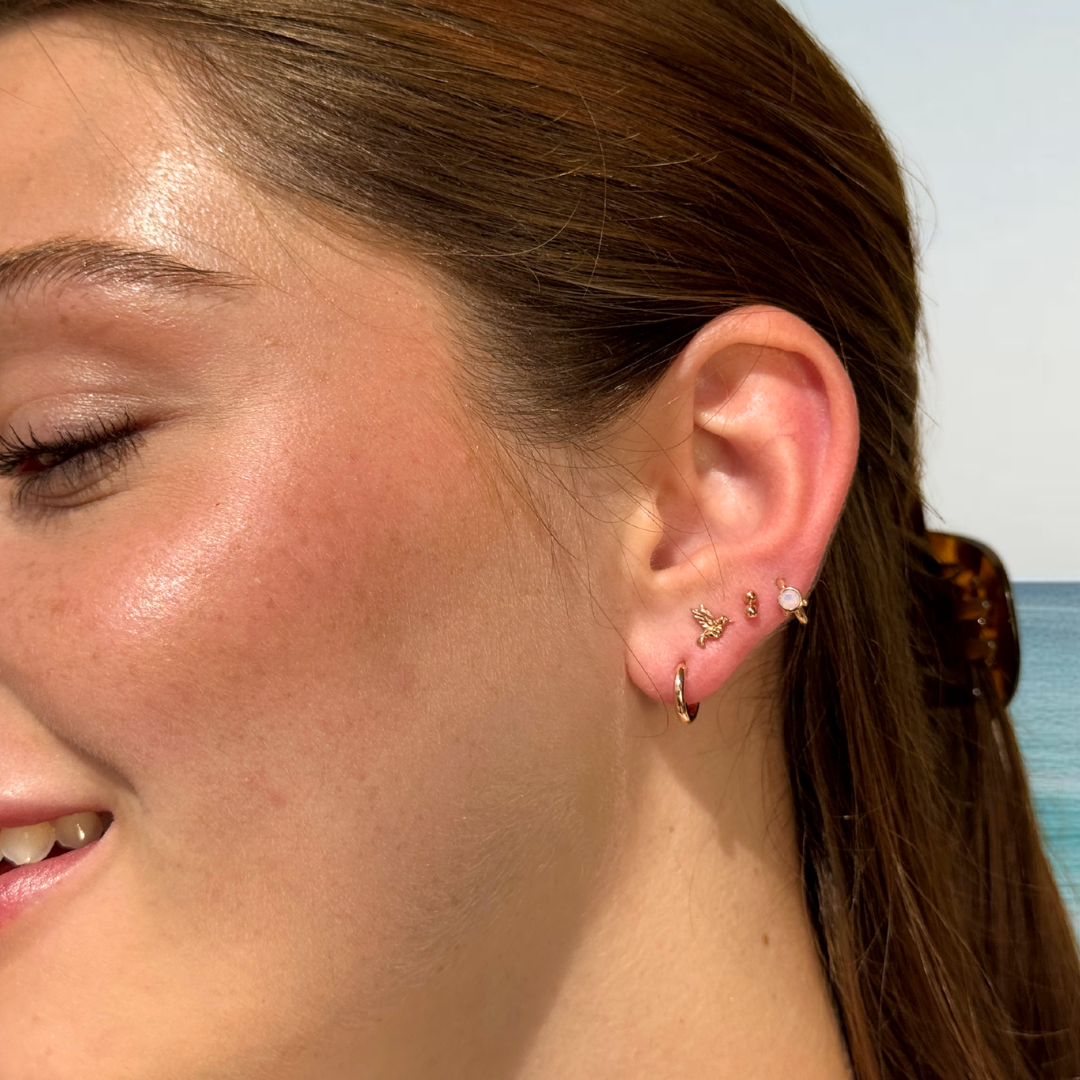
Dreaming of a curated ear full of trendy stacks and sparkly studs? We’re here for it! Curated ears (think multiple piercings artfully arranged on one ear) are all the rage, and for good reason – they let you show off your unique style in a million ways. Whether you’re planning to add a third lobe piercing, a helix, a tragus, or beyond, here are some tips to achieve your #EarGoals safely and stylishly:
-
Patience = piercing goals: When it comes to building an ear with multiple piercings, patience truly is a virtue. It might be tempting to go get three new piercings in one go (instant ear party! 🎉), but slowing down will give you better results. Space out your piercings over time and let each one heal fully before adding another. This not only helps each piercing heal without complications, but it also gives you time to plan your look. Think of each new piercing as a chapter in your style story – you don’t have to write them all at once. If you take it step by step, you’ll eventually have that gorgeous, full ear of bling without the nightmare of trying to heal a dozen holes at the same time. Remember, the curated ear trend is all about personalization and long-term style. Patience now will pay off with piercings that heal well and last a lifetime.
-
Plan your piercings (spacing & symmetry): Achieving that perfect ear stack is a bit of an art. A good rule of thumb: plan your ear piercings with spacing in mind. You want each earring to have its own moment to shine. If piercings are too close together, not only can they irritate each other while healing, but your earrings might look bunched up. Leave enough room between piercings (especially cartilage piercings) for swelling and for the jewelry to sit comfortably. It’s also wise to think about symmetry and balance. For example, some people follow the “3/2 piercing rule” – wearing three piercings on one ear and two on the other for a visually balanced look (more on that in the FAQs!). Ultimately, design your ear layout in a way that complements your ear shape and personal style. Feel free to consult with a professional piercer as well – they can offer insight on what will heal well and look good with your anatomy. Planning ahead means you’ll end up with a curated ear that not only looks amazing but heals without drama.
-
Dealing with bumps or keloids: Sometimes even the best aftercare and planning can’t prevent those little bumps that appear near a piercing. If you notice a small irritation bump (often a tiny, flesh-colored or red bump right next to the piercing hole), don’t panic. These are pretty common, especially with cartilage piercings or if an ear lobe piercing got irritated. They can result from friction (like sleeping on it too soon) or just your body’s way of reacting. To help it heal, go back to basics: keep the area clean, do warm saline compresses (press a warm saltwater-soaked pad or even a chamomile tea bag on the bump for a few minutes daily), and avoid aggravating it. Many irritation bumps shrink and disappear with consistent care once the cause of irritation is removed. Keloids, on the other hand, are more persistent raised scars that extend beyond the piercing site. These are less common, but if you have a bump that is growing, very firm, or doesn’t improve over time, you should consult a professional. A dermatologist or experienced piercer can advise on treatments for keloids (which might include medical intervention). The key takeaway: most bumps are not the end of the world – address them early, be gentle with your piercing, and seek expert help if you’re unsure. With the right care, you’ll be back to rocking your beautiful piercings bump-free.
In a nutshell, creating Instagram-worthy trendy ear stacks is totally achievable as long as you go about it thoughtfully. Take your time, plan your piercings, invest in quality jewelry, and listen to your body. Soon, you’ll have a curated ear that tells your story – and you’ll have earned serious bragging rights for how well you took care of each piercing along the way!
Rock Your Piercings with Confidence
You did it – you’re officially part of the pierced ears club! Now it’s time to rock those piercings with confidence. Whether you have a single dainty stud or a whole constellation of earrings up your ear, wear them with pride. You’ve taken the time to learn about ear piercing aftercare and put it into practice, and that’s something to celebrate. By caring for your piercings properly, you’ve unlocked the secret to stunning, hassle-free ear jewelry: healthy healed ears that let your style shine.
Remember, every piercing is a form of self-expression. It’s you showing the world a little piece of your personality. So strut your stuff! Mix and match those 14k fine gold earrings, show off that curated ear stack, or keep it simple with a pair of classic studs – whatever makes you feel great. And if anyone compliments your earrings (trust us, they will), you can happily share a tip or two about how you kept them clean and awesome. 😉
At Estella Collection, we’re proud to be part of your piercing journey. We believe that with the right aftercare and a dash of confidence, you can truly rock your piercings every day. So go ahead – flaunt your newly healed piercings, experiment with styles, and most importantly, enjoy the sparkle and joy that comes with them. You’ve earned it! Here’s to you and your beautiful, blinged-out ears. 🎉✨
FAQs
Q: Do’s and don’ts after ear piercing?
A: The basic do’s and don’ts are: Do clean your piercing daily (2-3 times a day) with saline, do wash your hands before touching it, do leave your starter earrings in for the full healing period, and do be patient and gentle with yourself. Don’t twist or turn the earrings unnecessarily, don’t use alcohol or peroxide on the piercing (they’re too harsh), don’t go swimming in pools or hot tubs for a couple of weeks, and don’t remove the earrings too early (the hole can close quickly if you do). Basically, baby the piercing in those early days – keep it clean, keep it in, and avoid any rough treatment. If you stick to those guidelines, you’ll set yourself up for a smooth healing.
Q: What is the best aftercare for ear piercings?
A: The gold standard for ear piercing aftercare is regular saline cleaning and minimal interference. This means cleaning the area around your piercing twice a day with a sterile saline solution (or salt water) to flush out any bacteria and keep the area hydrated. In addition, the best aftercare includes not touching the piercing except to clean it, and definitely not introducing any harsh chemicals. Some people also gently wash with a mild, fragrance-free soap once a day (usually in the shower) – that’s fine as long as you rinse well. The “best” aftercare is essentially keeping it simple: clean, rinse, dry, and repeat consistently. And of course, good aftercare isn’t just about products – it’s also about habits. So sleeping on clean pillowcases, keeping phones and headphones off the new piercing, and generally protecting it from knocks are all part of the best practices. If you follow these, you’re giving your ear the best chance to heal quickly and perfectly.
Q: What is the 3/2 piercing rule?
A: The “3/2 piercing rule” is more of a style guideline for those with multiple ear piercings. It refers to a balanced way to distribute piercings between your two ears: basically, one ear has three piercings and the other ear has two. The idea is that an asymmetrical arrangement (3 on one side, 2 on the other) creates a visually pleasing balance – it’s a popular ratio for a curated ear look. For example, you might wear three earrings on your right ear (say, first, second, and cartilage) and two earrings on your left ear (maybe first and second lobe). This 3-2 combo often looks harmonious and stylish, giving you an ear stack that’s interesting but not too perfectly symmetrical. Of course, it’s not a hard rule – you can have any number of piercings that make you happy! But if you’re looking for a starting point to design a multi-piercing ensemble, the 3/2 rule is a tried-and-true formula among fashionistas and piercing enthusiasts for an effortlessly cool look.
Q: Home remedies to heal ear piercing faster?
A: We all wish piercings would heal overnight, but truthfully, there’s no magic potion for instant healing – your body needs time. That said, there are a few home remedy tips that might help support the healing process (or at least make it more comfortable):
-
Sea salt soaks: This is essentially the same as saline cleaning. Dissolve non-iodized sea salt in warm water and soak the piercing (or use cotton pads to apply it). Warm saltwater increases blood flow to the area and helps keep it clean – it’s a tried-and-true remedy for aiding healing.
-
Chamomile compress: Brew a chamomile tea bag in hot water, let it cool to a comfortably warm temperature, then press it against the piercing for a few minutes. Chamomile has soothing, anti-inflammatory properties. Many piercers suggest this for cartilage piercings to calm irritation or bumps. Plus, the warmth feels nice!
-
Cold compress (for the first 24-48 hours): If your new piercing is very swollen or throbbing, applying a clean ice pack (wrapped in a paper towel) for short intervals can help reduce swelling and numb soreness. Don’t put ice directly on the skin – keep it gentle and clean.
-
Healthy lifestyle: It sounds basic, but eating well, staying hydrated, and getting enough sleep will help your body heal faster. Vitamin C and zinc are known for aiding wound healing, so munch on those fruits, veggies, and perhaps a supplement if you’re so inclined. Your body heals piercings like it heals any minor wound, so general good health goes a long way.
What to avoid? Probably any weird DIY concoctions your friend’s cousin swore by. Steer clear of putting things like apple cider vinegar, essential oils (undiluted), or excessive ointments on a fresh piercing – those can do more harm than good. Stick with gentle, proven remedies and time, and you’ll get there. ⏳
Q: Earring care after piercing infection – what should I do?
A: If you suspect your new piercing has developed an infection, first take a deep breath – it happens, and it can usually be resolved. Key things to do: don’t immediately yank out the earring. It might seem like you should remove it, but leaving the jewelry in can actually help – it allows any pus to drain out and keeps the hole from closing. If you take the earring out during an infection, you risk trapping the infection inside if the hole closes. Instead, keep the earring in and focus on cleaning the area. Clean the piercing gently but more frequently (3 times a day) with warm saline. You can also do a warm compress to help draw out any discharge. Keep an eye on it – if it’s a mild infection (slight redness, minor discharge) this routine might clear it up in a few days. However, if you have severe symptoms – like intense pain, a lot of swelling, thick green/yellow pus, or you’re feeling unwell overall – see a doctor or professional piercer right away. They might recommend an antibiotic or specific treatment.
Once the infection clears, you’ll want to give that piercing extra TLC. Make sure any earring you put back in is super clean (sterilize it with rubbing alcohol or a good jewelry cleaner). It’s often wise to switch to a hypoallergenic earring like titanium or 14k gold once you’re allowed to change it – sometimes infections can be partially due to an allergy to the metal. And of course, learn from the experience: maybe you need to clean more often, avoid sleeping on it, or keep hair products away. The good news is, with prompt care, most piercing infections clear up and you can continue your healing journey. Just don’t ignore it, and don’t hesitate to get professional advice if it looks worrying.
Q: Is it OK to shower after getting ears pierced?
A: Yes – showering is totally okay (and encouraged, because hygiene!). A new ear piercing doesn’t mean you have to avoid water entirely. Clean running water and mild soap won’t harm your piercing as long as you rinse well. In fact, shower time can be a convenient moment to gently clean your ears: let the warm water run over your piercing to soften any crust, and you can use a drop of mild, fragrance-free soap around the area, then rinse thoroughly. The main thing is what to do after the shower: you’ll want to dry the piercing because a damp area under an earring can be a breeding ground for bacteria. Use a clean paper towel or gauze to pat it dry (again, no old bath towels on that fresh piercing). Also, be careful not to snag your piercing on your towel when drying your hair or body. Avoid submerging your piercing in bath water (since bath tubs can have soap residue and stuff) – showers are cleaner. So yes, feel free to shower – just keep things clean and be gentle with that ear while you lather up and towel off.
Q: How long can you leave earrings out before the hole closes?
A: This depends on how healed and how old your piercing is. For a fresh piercing or one that’s still in the healing phase, you really shouldn’t leave the earring out at all – if you take it out even for a short time (think minutes or hours), there’s a good chance the hole will start to close. Piercings can be sneaky like that; the body wants to heal any “wound,” and it can start to seal up faster than you’d expect. If your piercing is fully healed (say you’ve had it for a year or more), it will stay open longer without jewelry, but exactly how long varies from person to person. Some people can leave earrings out for a week and still pop them back in fine, while others might find their piercing tight after 24 hours. As a general rule, ear lobe piercings tend to be a bit more forgiving – you might be able to go a few days without earrings once it’s well-healed. Cartilage piercings (like helix, tragus, etc.) can start closing faster and can be harder to reinsert jewelry if left empty even for a short time. If you’ve had a piercing for many years, it usually becomes quite stable (for example, if you got your ears pierced as a child and haven’t worn earrings in months, you might still be able to put one in). But to be safe, especially in the first year or two of a piercing, try not to leave it earring-free for more than a day. And if you must take it out (for surgery, sports, etc.), consider putting a clear retainer in its place to keep the hole open. When in doubt, err on the side of caution – keeping an earring or retainer in will save you the trouble of re-piercing if it closes up.
Q: What is the best solution for piercing aftercare?
A: The hands-down best solution for cleaning a new piercing is a saline solution, which is just a fancy way to say salt water. 😂 Specifically, a mixture of sterile water and sodium chloride (salt) at the right concentration (0.9%) is ideal. You have a couple of options: you can buy pre-made piercing aftercare saline (often sold as wound wash or piercing spray) – it’s convenient and always the perfect ratio. Or you can DIY by mixing 1/4 teaspoon of non-iodized sea salt into 8 ounces (1 cup) of warm distilled water. (Make sure your hands are clean and the container is clean when you mix it.) Saline is the best because it’s gentle on your skin and mimics your body’s natural fluids, so it won’t sting or irritate the new piercing. It keeps the tissue moist (which promotes healing) and helps loosen and clean away any debris.
Other solutions like alcohol, peroxide, or antiseptics (Betadine, etc.) are not recommended for routine aftercare – they can kill bacteria but they also kill healthy cells and dry out the area, which slows healing. So stick with saline for day-to-day cleaning. If you want a mild soap for the shower, choose something unscented and gentle (like a baby soap or castile soap) and use it sparingly. But overall, plain saline is your piercing’s best friend. It’s simple, effective, and doctor/piercer-approved. Keep a little bottle of it in your bag or bathroom, and you’re good to go!
Happy healing and may your piercings stay sparkly and trouble-free! ✨
Popular Searches
Rook Piercing Jewelry | Gold Cartilage Earring | Daith Piercing Earring | Conch Piercing Jewelry | Amethyst Birthstone Jewelry | Citrine Birthstone Jewelry | Gold Cartilage Earring | Tragus Earrings | Ear Lobe Piercing Jewelry
Leave a comment